- Published on
Building a CMS with Filament (Part - 1)
Filament ကိုသုံးပြီး powerful ဖြစ်တဲ့ CMS တစ်ခုကို လွယ်လွယ်ကူကူ တည်ဆောက်လို့ ရပါတယ်။
Filament အကြောင်းကို အရင်တုန်းက ဒီမှာ ရေးခဲ့ပါတယ်။ အလွယ်ပြန်ပြောရရင် Admin Panel အတွက် အသင့်ရေးပြီးသား livewire components တွေကို collection လုပ်ထားတဲ့ package တစ်ခုပါ။
Project Overview
- Source Code - https://github.com/PyaeSoneAungRgn/organic-cms
- Demo - https://organic-cms.pyaesoneaung.dev
email: [email protected]
password: admin123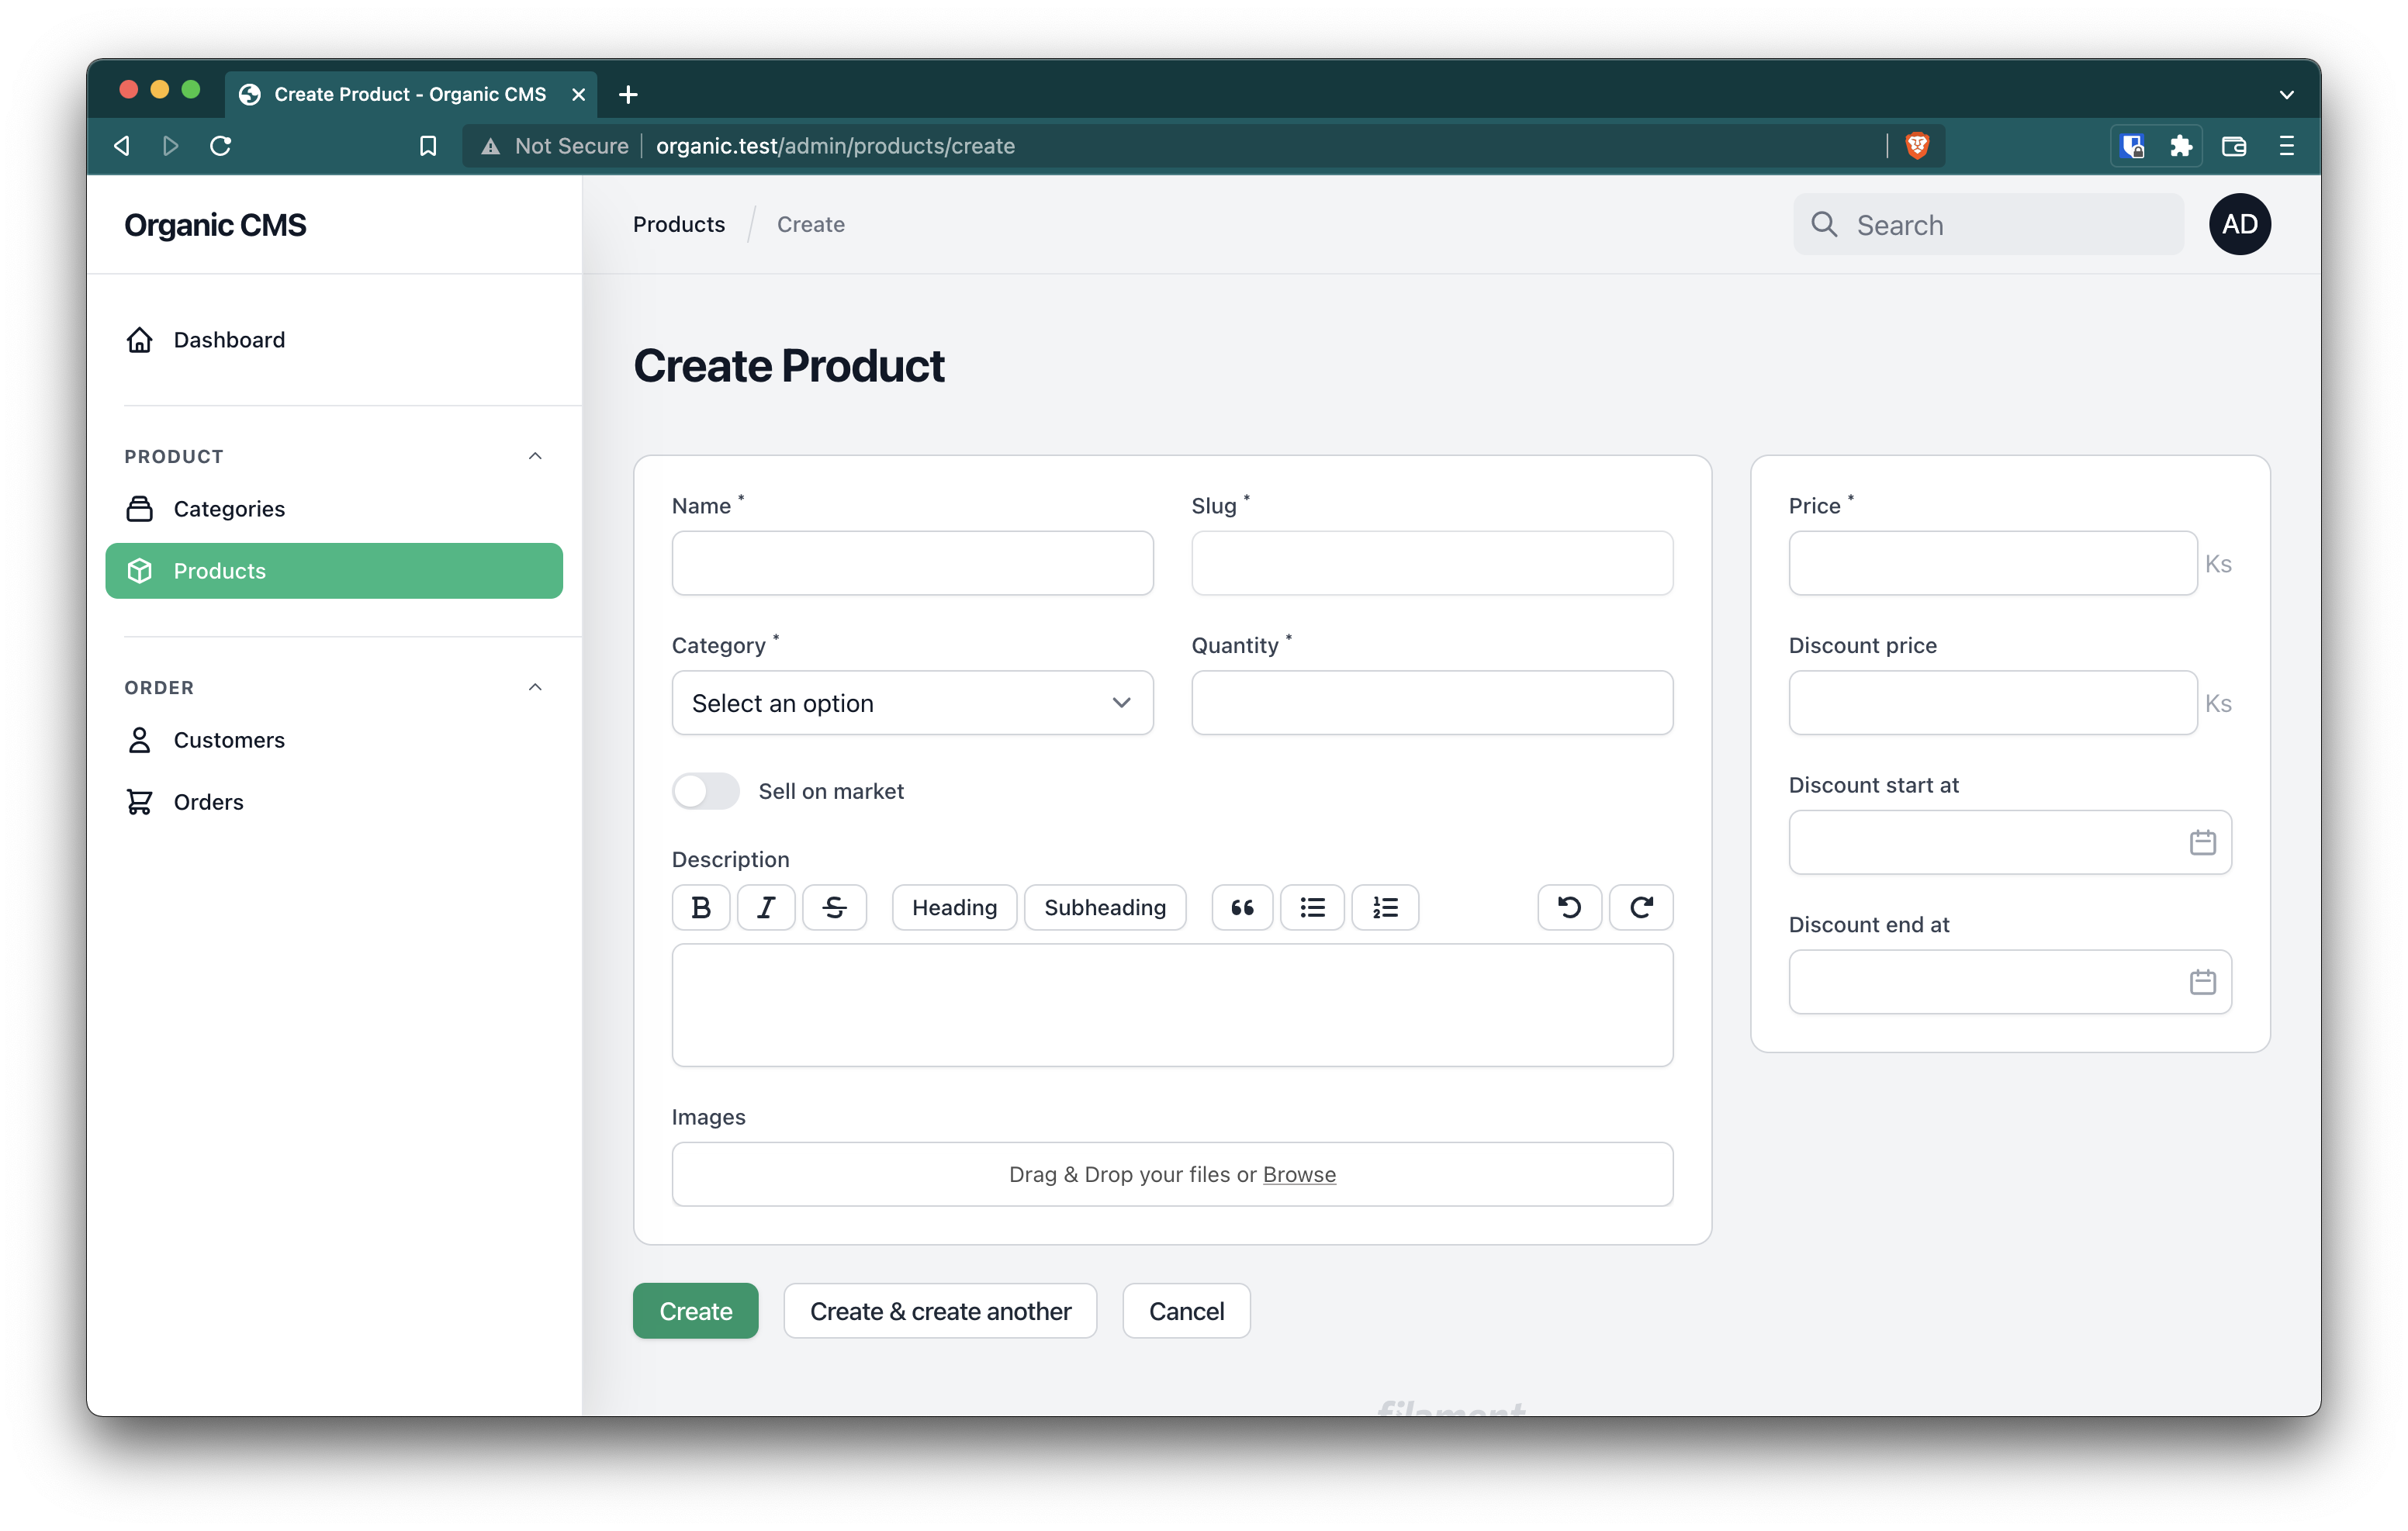
Project ကတော့ရှင်းပါတယ်။ Product ကို Category အလိုက် create လုပ်မယ်။ ပြီးရင် Customer က Product တွေကို Order တင်မယ်။
Requirements
- PHP 8 ရှိဖို့ လိုပါတယ်
- Laravel Basic ကို သေချာနားလည်ဖို့လိုပါတယ်။ ဒီနေရာမှာ ကျွန်တော် migration run တာတွေ၊ laravel new project လုပ်တာတွေ ကိုပြောမှာ မဟုတ်ပါဘူး။ Filament ကိုသုံးပြီး from တွေ၊ table တွေ၊ admin panel တည်ဆောက်သွားတာကိုပဲ အဓိကထားပြီး ပြောပြသွားမှာပါ။
Installation
အရင်ဆုံး Laravel new project တစ်ခုလုပ်ပြီး filament ကို install လုပ်ပါမယ်။
composer require filament/filament:"^2.0"Install လုပ်ပြီးရင်
php artisan make:filament-userကို run ပြီး user account တစ်ခုလုပ်လိုက်ပါ။ ဒါဆိုရင် localhost:8000/admin မှာ admin panel ကို login ဝင်လို့ရပါပြီ။
Category CRUD
Category အတွက်လိုအပ်တဲ့ form တွေ၊ table တွေ ဆောက်ဖို့အတွက်
php artisan make:filament-resource Categoryကို run ပါမယ်။ ဒါဆိုရင် app/Filament/Resources/CategoryResource.php ဆိုတဲ့ file တစ်ခု ရလာပါမယ်။
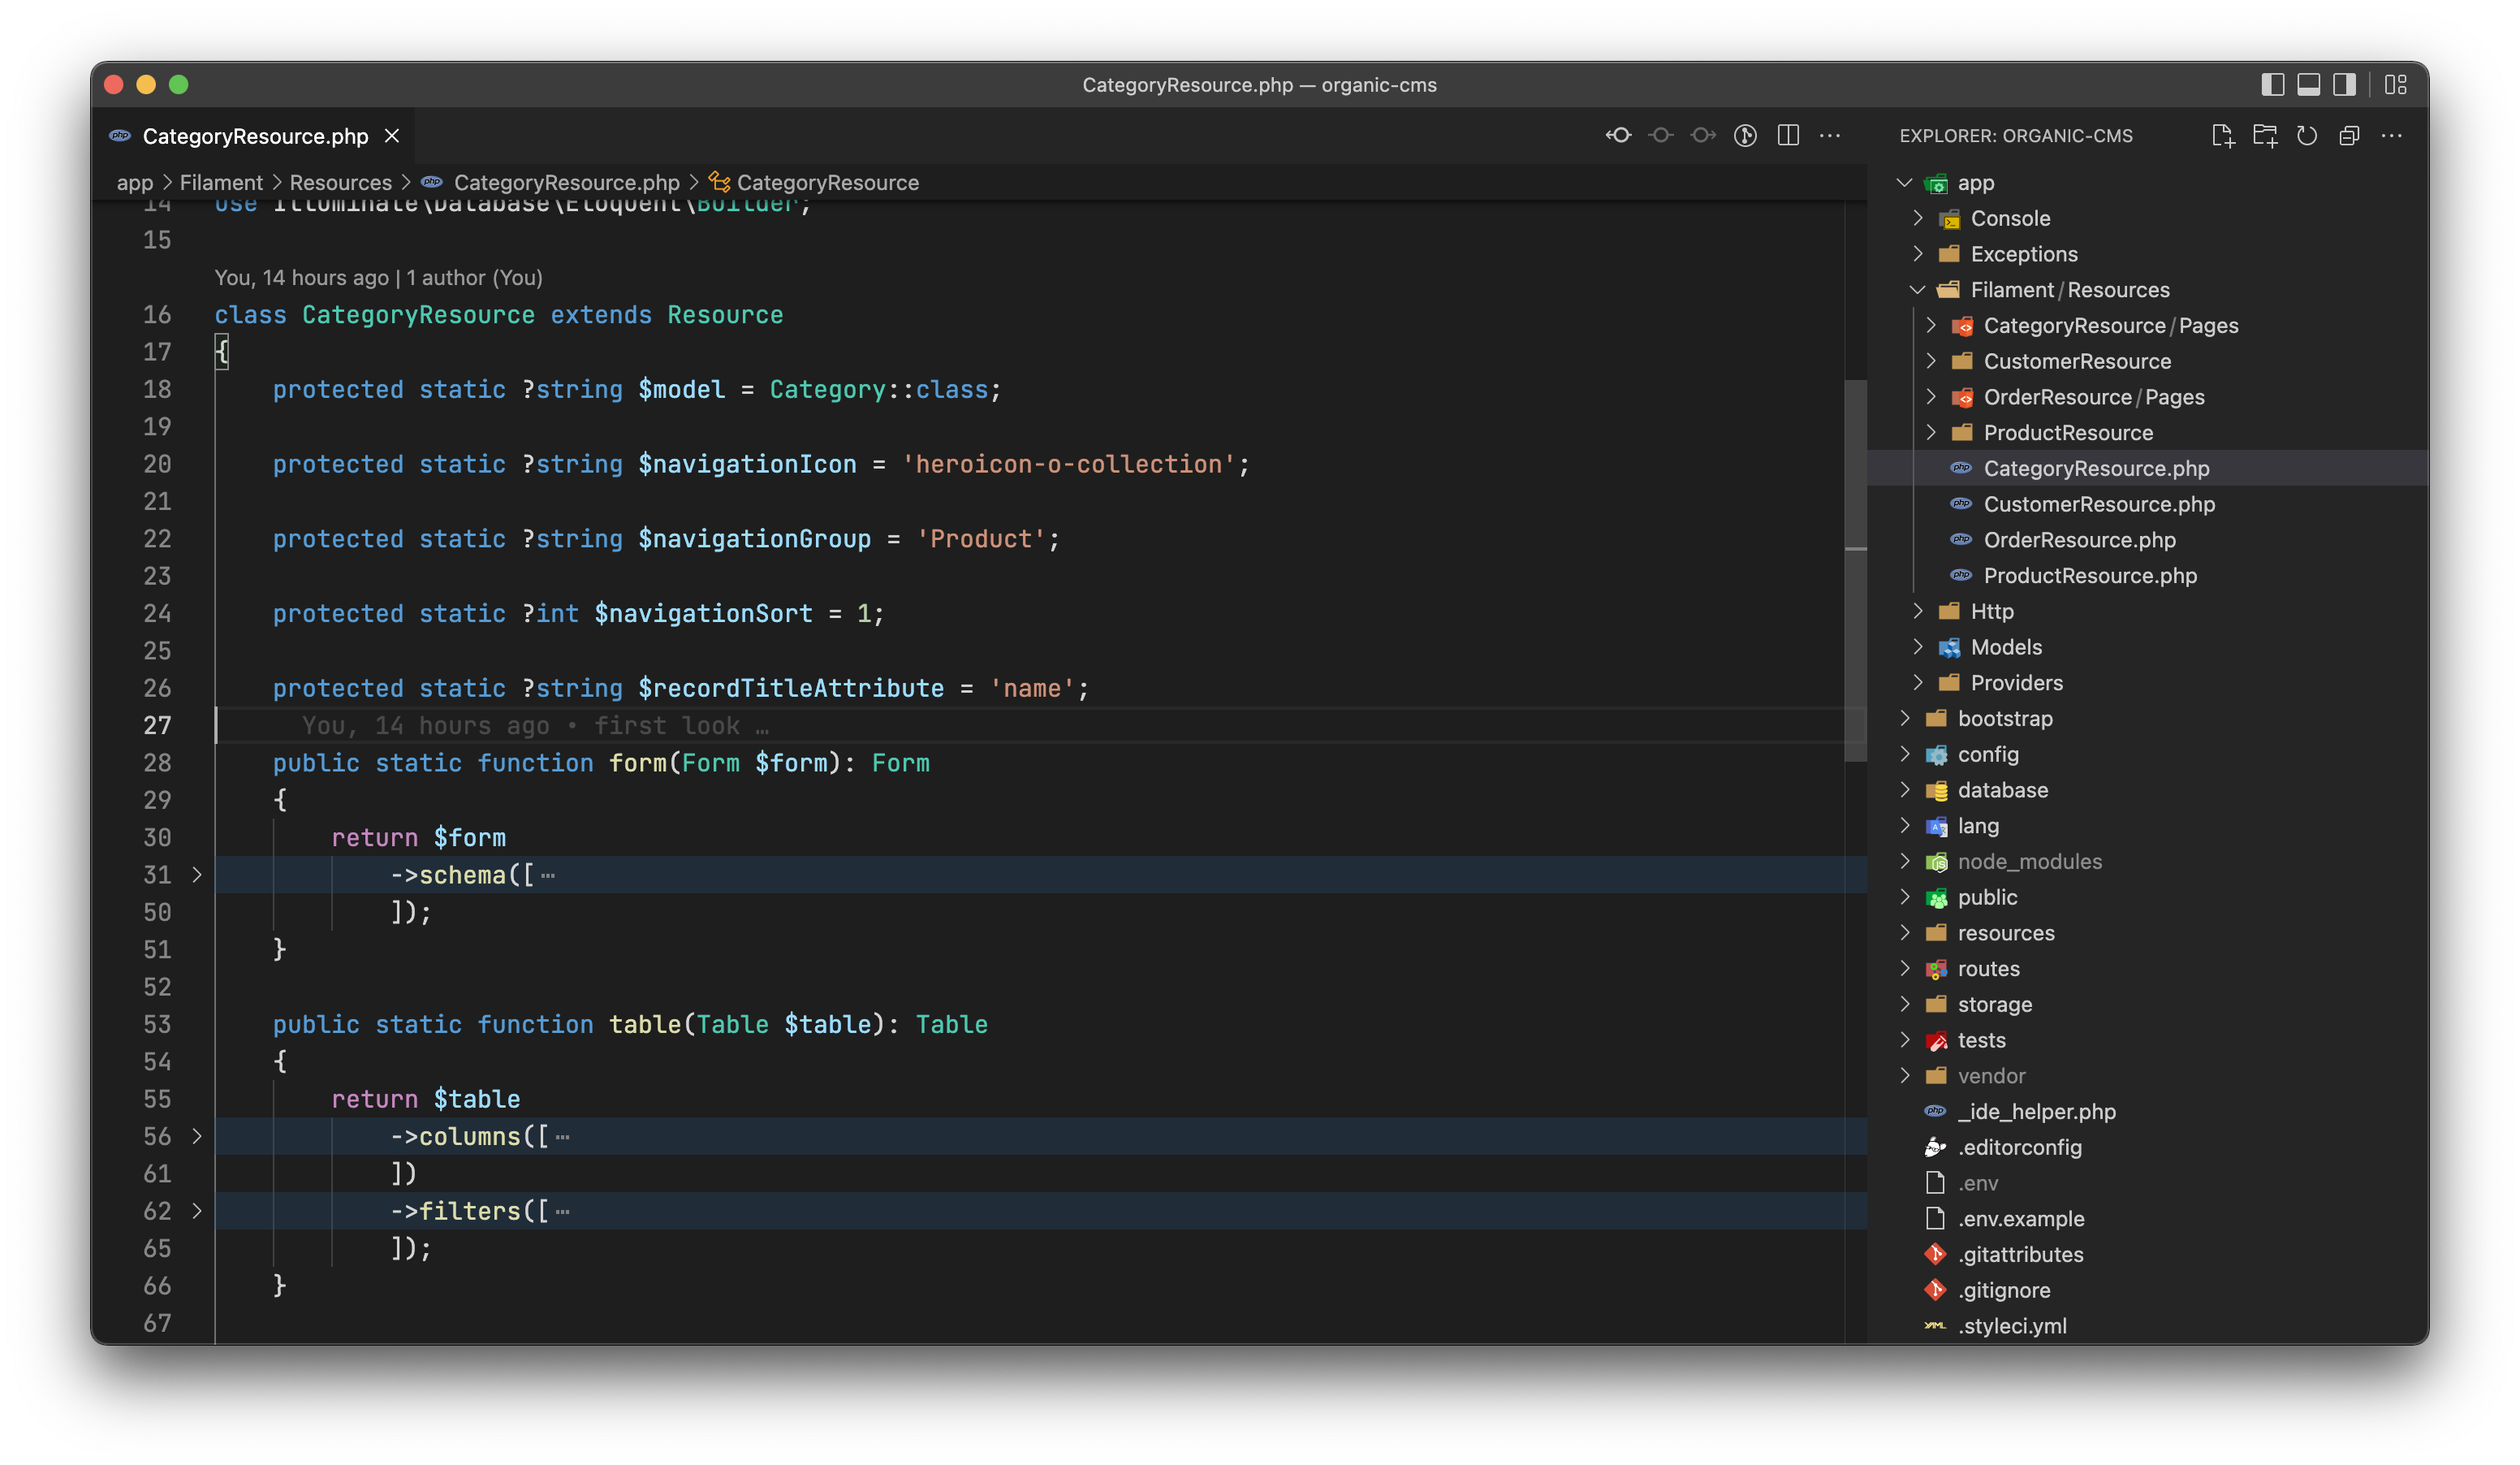
CategoryResource.php မှာ form() နဲ့ table() ဆိုတဲ့ function ၂ ခု ကိုပဲ အဓိကထား ကြည့်သွားပါမယ်။
form() ရဲ့ function အတွင်းထဲမှာ category from ဆောက်သွားမှာဖြစ်ပြီး table() function အတွင်းထဲမှာတော့ category table ဆောက်သွားမှာပါ။
Category table ကို အရင်ဆောက်ပါမယ်။
public static function table(Table $table): Table
{
return $table
->columns([
Tables\Columns\TextColumn::make('name')
->sortable()
->searchable(),
Tables\Columns\BooleanColumn::make('show'),
])
->filters([
Tables\Filters\Filter::make('show')
->query(fn (Builder $query): Builder => $query->where('show', true)),
]);
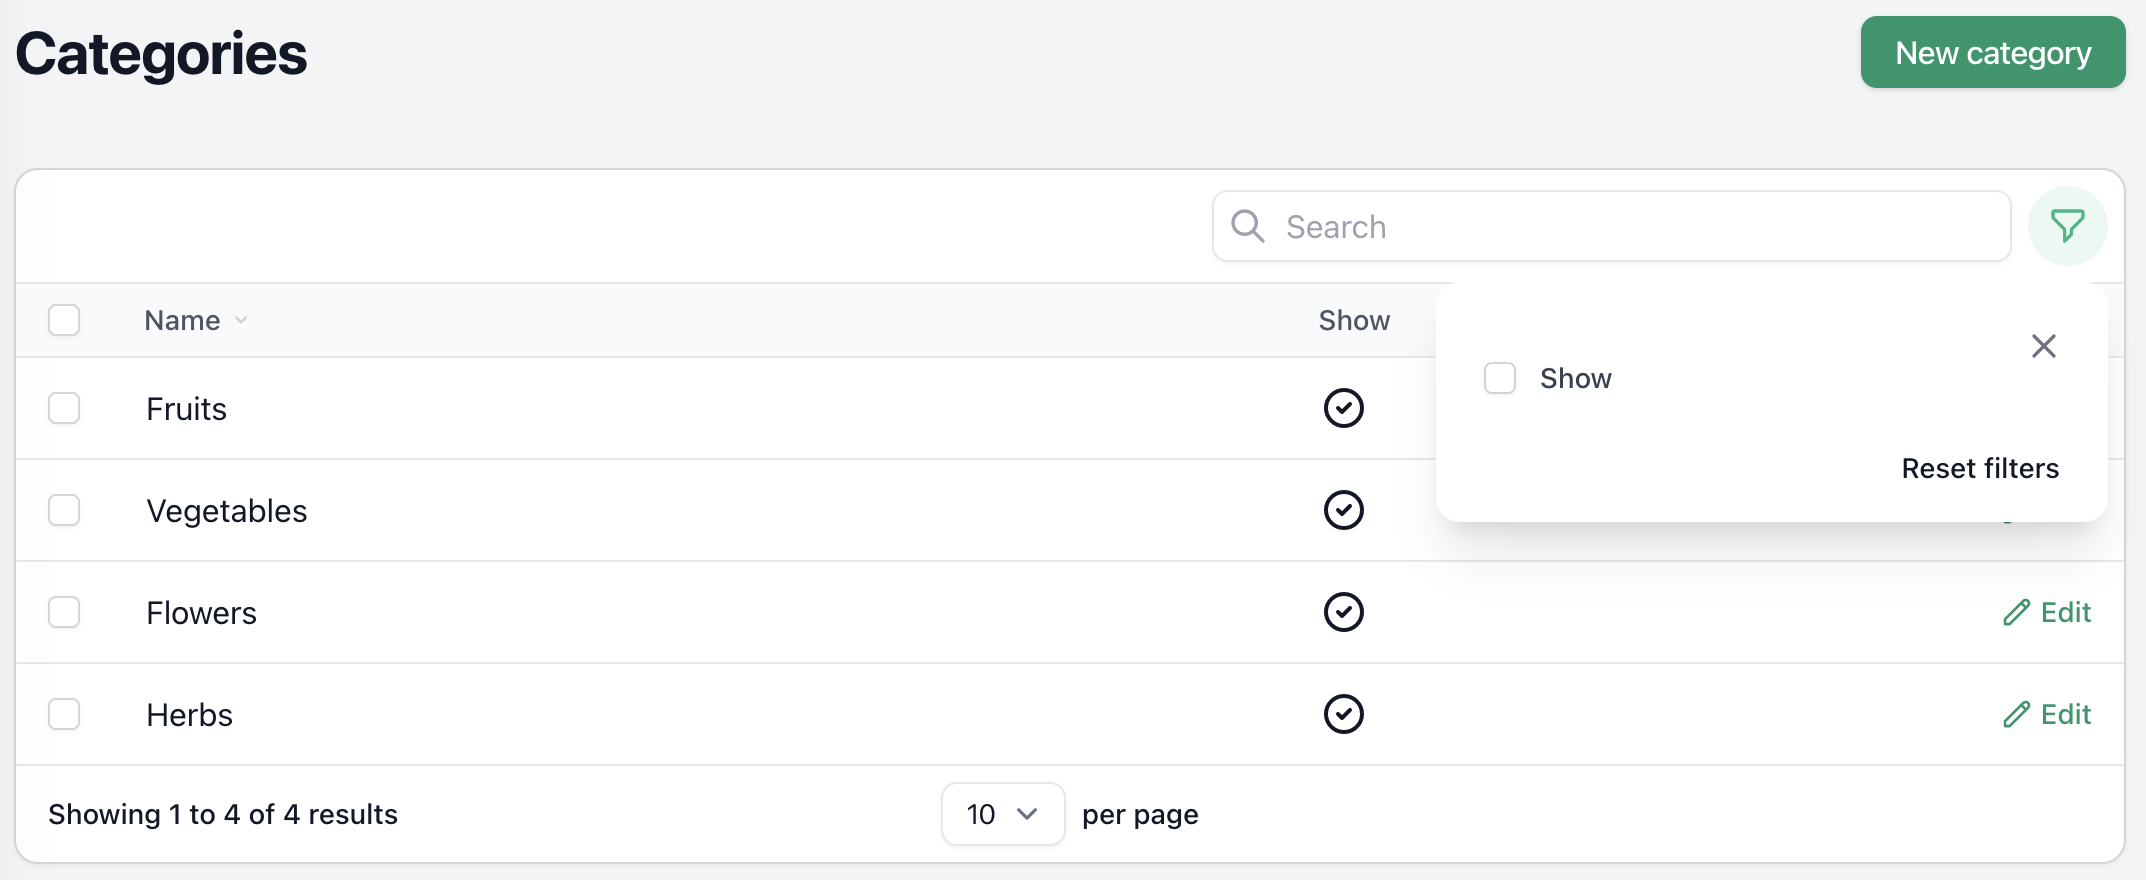
}$table->columns မှာ category အတွက် ပေါ်စေချင်တဲ့ columns တွေ array နဲ့ ထည့်ပေးရုံပါပဲ။ sortable() နဲ့ searchable() ထည့်တာက name column ကို sorting စီလို့ရမယ်၊ ရှာလို့ရမယ်လို့ သတ်မှတ်တာပါ။ filters() ကတော့ category မှာမှ show: true ဖြစ်တာပဲလိုချင်တာတို့၊ active ဖြစ်တာပဲ လိုချင်တာတို့ စတာတွေကို UI မှာ အလွယ်တကူ filter လုပ်လို့ရအောင် ပြပေးဖို့အတွက်ပါ။ ဒါဆိုရင် အခုလို table ရပါပြီ။

Filter icon ကို နှိပ်လိုက်ရင် အခုလို ကျွန်တော်တို့ filters fucnction မှာ ရေးထားတဲ့ filter ကိုတွေ့ရမှာပါ။
အခု category form ကိုဆောက်ပါမယ်။
public static function form(Form $form): Form
{
    return $form
        ->schema([
            Forms\Components\Card::make()
                ->schema([
                    Forms\Components\Grid::make()
                        ->schema([
                            Forms\Components\TextInput::make('name')
                                ->required()
                                ->reactive()
                                ->afterStateUpdated(function (Closure $set, $state) {
                                    $set('slug', str()->slug($state));
                                }),
                            Forms\Components\TextInput::make('slug')
                                ->disabled()
                                ->required(),
                            Forms\Components\Toggle::make('show')
                                ->required()
                                ->inline(false),
                        ])
                ])
        ]);
}
Card::make() ဆိုတာကတော့ textbox တွေကို UI မှာ div တစ်ခုထဲထည့်ချင်လိုပါ။ Grid::make() ကတော့ css grid div တစ်ခုလိုချင်လို့ပါ။ Default က column 2 ခုပါပါတယ်။ TextInput::make('name') ကတော့ category name ရိုက်ထည့်ဖို့ textbox တစ်ခုလုပ်တာပါ။ reactive() ဆိုကတော့ အဲ့ field မှာ တစ်ခုခု change တိုင်း form ကို update လုပ်မယ်လို့ဆိုလိုတာပါ။
->afterStateUpdated(function (Closure $set, $state) {
    $set('slug', str()->slug($state));
})
ဒါကတော့ name field မှာ တစ်ခုခု change တိုင်း slug field မှာ name ရဲ့ slug ကို generate ထုတ်ပြီး update လုပ်တာပါ။ အဲ့တာကြောင့် slug field ကို typing လုပ်လို့ မရအောင် disabled() နဲ့ထိန်းထားတာပါ။
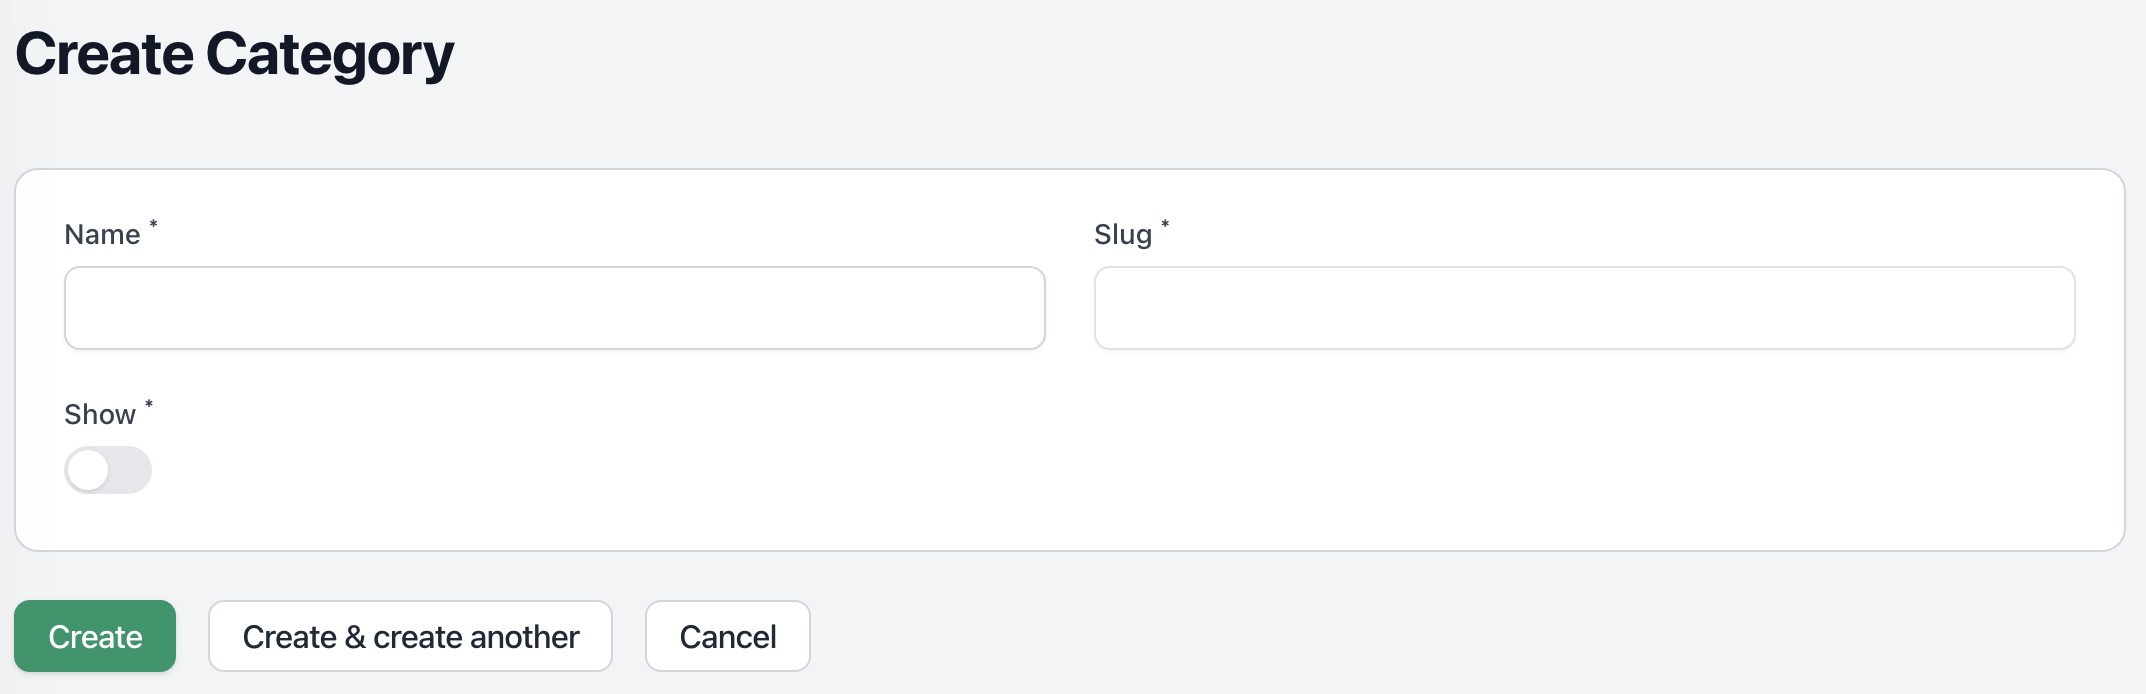
Toggle::make('show') ကတော့ UI မှာ show အတွက် toggle switch ပြပေးတာပါ။ inline(false) ကတော့ label နဲ့ toggle switch နဲ့ကို အပေါ်အောက်ပြချင်လို့ပါ။ ဒါဆို အခုလို form ရပါပြီ။
ဒါဆိုရင် category CRUD အပိုင်းပြီးပါပြီ။ ပိုပြီး complex ဖြစ်တဲ့ တခြား form တွေ၊ table တွေကို နောက်အပိုင်းမှပဲ ဆက်ပြီးရေးသွားပါမယ်။ သိချင်တာ ရှိရင်လည်း မေးလို့ရပါတယ် ခင်ဗျာ။