- Published on
Laravel Workflow
Laravel project မှာ ရှိသင့်တဲ့ code linting နဲ့ code cleanup တွေကို git hooks နဲ့ GitHub CI သုံးပြီး automate လုပ်ပါမယ်။
Model shouldBeStrict
ပထမဆုံး Model တွေကို strict ဖြစ်အောင်အရင်လုပ်ပါမယ်။ app/Providers/AppServiceProvider.php
use Illuminate\Database\Eloquent\Model;

public function boot(): void
{
    Model::shouldBeStrict();
}
Model::shouldBeStrict() က feature ၃ခု လုပ်ပေးပါတယ်။
ပထမ တစ်ခုက lazy loading ကို prevent လုပ်ပေးတာပါ။
$articles = Article::get();

foreach ($articles as $article) {
     $article->user->name;
}
ဒီ code အရ User ကို database ကနေ loop မပြီးမချင်း query ဆွဲနေမှာပါ။ ဒါမျိုးရေးမိတာနဲ့ error throw ပေးမှာပါ။
ဒုတိယ feature နဲ့ တတိယ feature ကတော့ model မှာ fillable မရှိတဲ့ attribute ကို fill လုပ်ရင် error တက်တာနဲ့ model မှာ တကယ် မရှိတဲ့ property ကို သွားခေါ်ရင် error တက်မှာပါ။
အဲ့ feature တွေကို development မှာပဲ error ပြချင်ပြီး production မှာ မပြချင်ရင် ဒါမျိုးရေးလို့ရပါတယ်။
use Illuminate\Database\Eloquent\Model;

public function boot(): void
{
    Model::shouldBeStrict(! $this->app->isProduction());
}
Prevent Destructive Commands
ဒါကတော့ migrate:fresh နဲ့ migrate:refresh တို့လို database ကို wipe လုပ်မယ့် command တွေကို production မှာ run မရအောင်လုပ်တာပါ။
use Illuminate\Support\Facades\DB;

public function boot(): void
{
    DB::prohibitDestructiveCommands($this->app->isProduction());
}
Duster
Duster ကတော့ code style တွေကို automate ပြင်ပေးတဲ့ tool တစ်ခုပါ။ သူမှာ feature တွေ အများကြီးပါပေမယ့် အဲ့ထဲကမှ Laravel pint တစ်ခုကိုပဲ သုံးပါမယ်။ အရင်ဆုံး duster ကို install လုပ်ပါမယ်။
composer require tightenco/duster --devဒါဆိုရင်တော့ ဒီ command ၂ခု သုံးလို့ရပါပြီ။
./vendor/bin/duster lint --using=pint
./vendor/bin/duster fix --using=pint
lint က code style မှန်လား မှားလား စစ်ပြီး မှားနေရင် ဘာတွေမှားနေလဲ ပြပေးပါတာပါ။ တကယ့် source code မှာ သွားမပြင်ပေးပါဘူး။ fix ကတော့ source code မှာပါပြင်ပေးပါတယ်။
ဒီနေရာမှာ Laravel pint သုံးလည်းရတာပဲ ဘာလို့ duster သုံးတာလဲ မေးစရာရှိပါတယ်။ Duster မှာက တခြား custom command တွေကို တွဲ run လို့ရလို့ပါ။ ဉပမာ phpstan တို့ pestphp တို့။ ပြီးတော့ Husky Hooks ကို publish လုပ်ဖို့လည်း built-in ပါလို့ပါ။ ဒီအကြောင်းတွေကို အောက်မှာ ဆက်ရှင်းသွားပါမယ်။
Rector
Rector က php code တွေကို upgrade နဲ့ refactoring လုပ်ပေးတာပါ။ Rector က အရမ်းကျယ်ပြန့်ပါတယ် သူ့အကြောင်းကြီးပဲ သပ်သပ် blog ရေးရင်ကို မနည်းဘူးရေးရမှာ။ ဒီ blog မှာတော့ php code တွေကို upgrade နဲ့ refactoring လုပ်ပေးတယ် လို့ အလွယ်မှတ်ထားရင်ရပါပြီ။ ဉပမာ
Route::get('/', function () {
    return view('welcome');
});
ဒီ code ဆိုရင် Laravel ရဲ့ web.php က default route ပါ။ အဲ့ဒါကို rector က အခုလို php arrow function နဲ့ upgrade လုပ်ပေးသွားမှာပါ။
Route::get('/', fn () => view('welcome'));Rector ကို install လုပ်ပါမယ်။
composer require rector/rector --devပြီးရင်တော့ rector.php ဆိုပြီး project root folder မှာ create လုပ်ပါမယ်။
<?php

declare(strict_types=1);

use Rector\Config\RectorConfig;

return RectorConfig::configure()
    ->withPaths([
        __DIR__.'/app',
        __DIR__.'/config',
        __DIR__.'/routes',
    ])
    ->withPhpSets();
ဒါဆိုရင်
vendor/bin/rectorဆိုပြီး run လို့ရပါပြီ။
ဒီ command ကို duster ထဲထည့်ဖို့အတွက် project root folder မှာ duster.json ဆိုပြီး file တစ်ခု create လုပ်ပါမယ်။
{
    "scripts": {
        "lint": {
            "rector": [
                "./vendor/bin/rector",
                "--dry-run"
            ]
        },
        "fix": {
            "rector": [
                "./vendor/bin/rector"
            ]
        }
    },
    "processTimeout": 180
}
ဒါဆိုရင် duster နဲ့ အခုလို run လို့ရပါပြီ။
./vendor/bin/duster lint --using=rector
./vendor/bin/duster fix --using=rector
PHPStan
PHPStan ကတော့ error ရှာတဲ့ tool တစ်ခုပါ။ ဒီဟာလည်း တော်တော်ကျယ်ပြန့်ပါတယ်။ ဉပမာ user object မှာ helloWorld ဆိုတဲ့ function က တကယ်မရှိပါဘူး။
$user = new User;
$user->helloWorld();
ဒါမျိုးရေးထားရင် error throw မှာပါ။ Laravel အတွက် အခုလို install လုပ်လို့ရပါတယ်။
composer require --dev "larastan/larastan:^3.0"ပြီးရင်တော့ project root folder မှာ phpstan.neon ဆိုပြီး file တစ်ခု create လုပ်ပါမယ်။
includes:
    - vendor/larastan/larastan/extension.neon
    - vendor/nesbot/carbon/extension.neon

parameters:

    paths:
        - app/

    # Level 10 is the highest level
    level: 5

#    ignoreErrors:
#        - '#PHPDoc tag @var#'
#
#    excludePaths:
#        - ./*/*/FileToBeExcluded.php
ဒါဆိုရင်
./vendor/bin/phpstan analyseဆိုရင် run လို့ရပါပြီ။ ဒီ command ကိုလည်း duster မှာ အခုလို integrate လုပ်ပါမယ်။
duster.json
{
    "scripts": {
        "lint": {
            "rector": [
                "./vendor/bin/rector",
                "--dry-run"
            ],
            "phpstan": [
                "./vendor/bin/phpstan",
                "analyse"
            ]
        },
        "fix": {
            "rector": [
                "./vendor/bin/rector"
            ]
        }
    },
    "processTimeout": 180
}
ဒါဆိုရင် အခုလို run လို့ရပါပြီ။
./vendor/bin/duster lint --using=phpstanSetup Githooks
./vendor/bin/duster lint --using=rector,phpstan,pint
./vendor/bin/duster fix --using=rector,pint
လက်ရှိက ဒီ command နှစ်ခုကို manual run မှသာ အလုပ်လုပ်သွားတာပါ။ Commit တစ်ခုပေးတိုင်း အလုပ်လုပ်ဖို့ အတွက်ဆိုရင် Githook setup လုပ်ဖို့လိုပါတယ်။ Setup လုပ်ဖို့အတွက်
./vendor/bin/duster husky-hooksဆိုပြီး run ပါမယ်။ ဒါဆိုရင် သူ့ဘာသာ husky သွင်းပြီး setup လုပ်သွားမှာပါ။ ပြီးရင်တော့ အသစ်ရလာတဲ့ lint-staged.config.js file မှာ အခုလို ပြင်ပါမယ်။
export default {
    "**/*.php*": [
        "vendor/bin/duster lint --using=phpstan",
        "vendor/bin/duster fix --using=rector,pint"
    ]
}
ဒါဆိုရင်တော့ git commit run လိုက်ရင် တကယ် commit မဖြစ်ခင်မှာ php file changes တွေရှိရင် ဒီ command တွေ auto run သွားမှာပါ။ ဘာ error မှ မရှိမှ၊ အားလုံး fix ပြီးမှ commit တကယ်ဖြစ်သွားမှာပါ။
တကယ်လို့ error တက်လည်း commit ပေးချင်တယ်ဆိုရင်တော့
git commit -m "wip" --no-verify--no-verify ထည့်ပေးရင် ရပါတယ်။
ဒီနေရာ တစ်ခုသတိထားဖိုလိုပါတယ်။ Git clone ပြီးရင် npm run install တစ်ကြိမ် run ထားမှသာ Git Hook က အလုပ်လုပ်မှာပါ။
GitHub CI
Company တွေမှာဆိုရင် project ကို တစ်ယောက်ထဲရေးတာထက် တခြားသူတွေနဲ့ ပေါင်းရေးရတာ ပိုများပါတယ်။ ဉပမာ Ruby ရေးတဲ့ တစ်ယောက်က php file ကို ပြင်စရာရှိလို့ Notepad နဲ့ ဝင်ပြင်ပြီး commit ဝင်ပေးသွားတာမျိုးလဲ ဖြစ်နိုင်ပါတယ်။ အဲ့လို အခြေနေမှာ code style က format မကျတာမျိုးတွေ ဖြစ်နိုင်ခြေများပါတယ်။
GitHub action ကတော့ PR တင်လိုက်တာ ဖြစ်ဖြစ် commit ပေးလိုက်တာ ဖြစ်ဖြစ် ကျတော်တို့ setup လုပ်ထားတဲ့ duster lint ကို run ပြီး အဆင်မပြေရင် error ပြပေးမှာပါ။ ဒီနေရာမှာ autocommit သုံးပြီးတော့ တစ်ခါထဲ fix လို့လည်းရပါတယ်။ ကျတော်ကတော့ personally error ပဲပြရင် လုံလောက်တယ် ယူဆပါတယ်။ PR မှာလည်း action success ဖြစ်မှ merge လို့ရအောင်လည်း လုပ်လို့ရတယ်ဆိုတော့။
GitHub action publish လုပ်ဖို့ အတွက်
./vendor/bin/duster github-actionsဆိုပြီး run ပါမယ်။ ပြီးရင်တော့ အသစ်ရလာတဲ့ .github/workflows/duster-lint.yml မှာ အခုလို ပြင်ပါမယ်။
name: Duster Lint

on:
    push:
        branches: [ main ]
    pull_request:

jobs:
  duster:
    runs-on: ubuntu-latest

    steps:
      - uses: actions/checkout@v4
        with:
          ref: ${{ github.event.pull_request.head.ref }}
          repository: ${{ github.event.pull_request.head.repo.full_name }}

      - name: Setup PHP
        uses: shivammathur/setup-php@v2
        with:
          php-version: 8.3
          tools: composer:v2
          coverage: xdebug

      - name: Install Dependencies
        run: composer install

      - name: "Duster Lint"
        run: ./vendor/bin/duster lint --using=phpstan,rector,pint
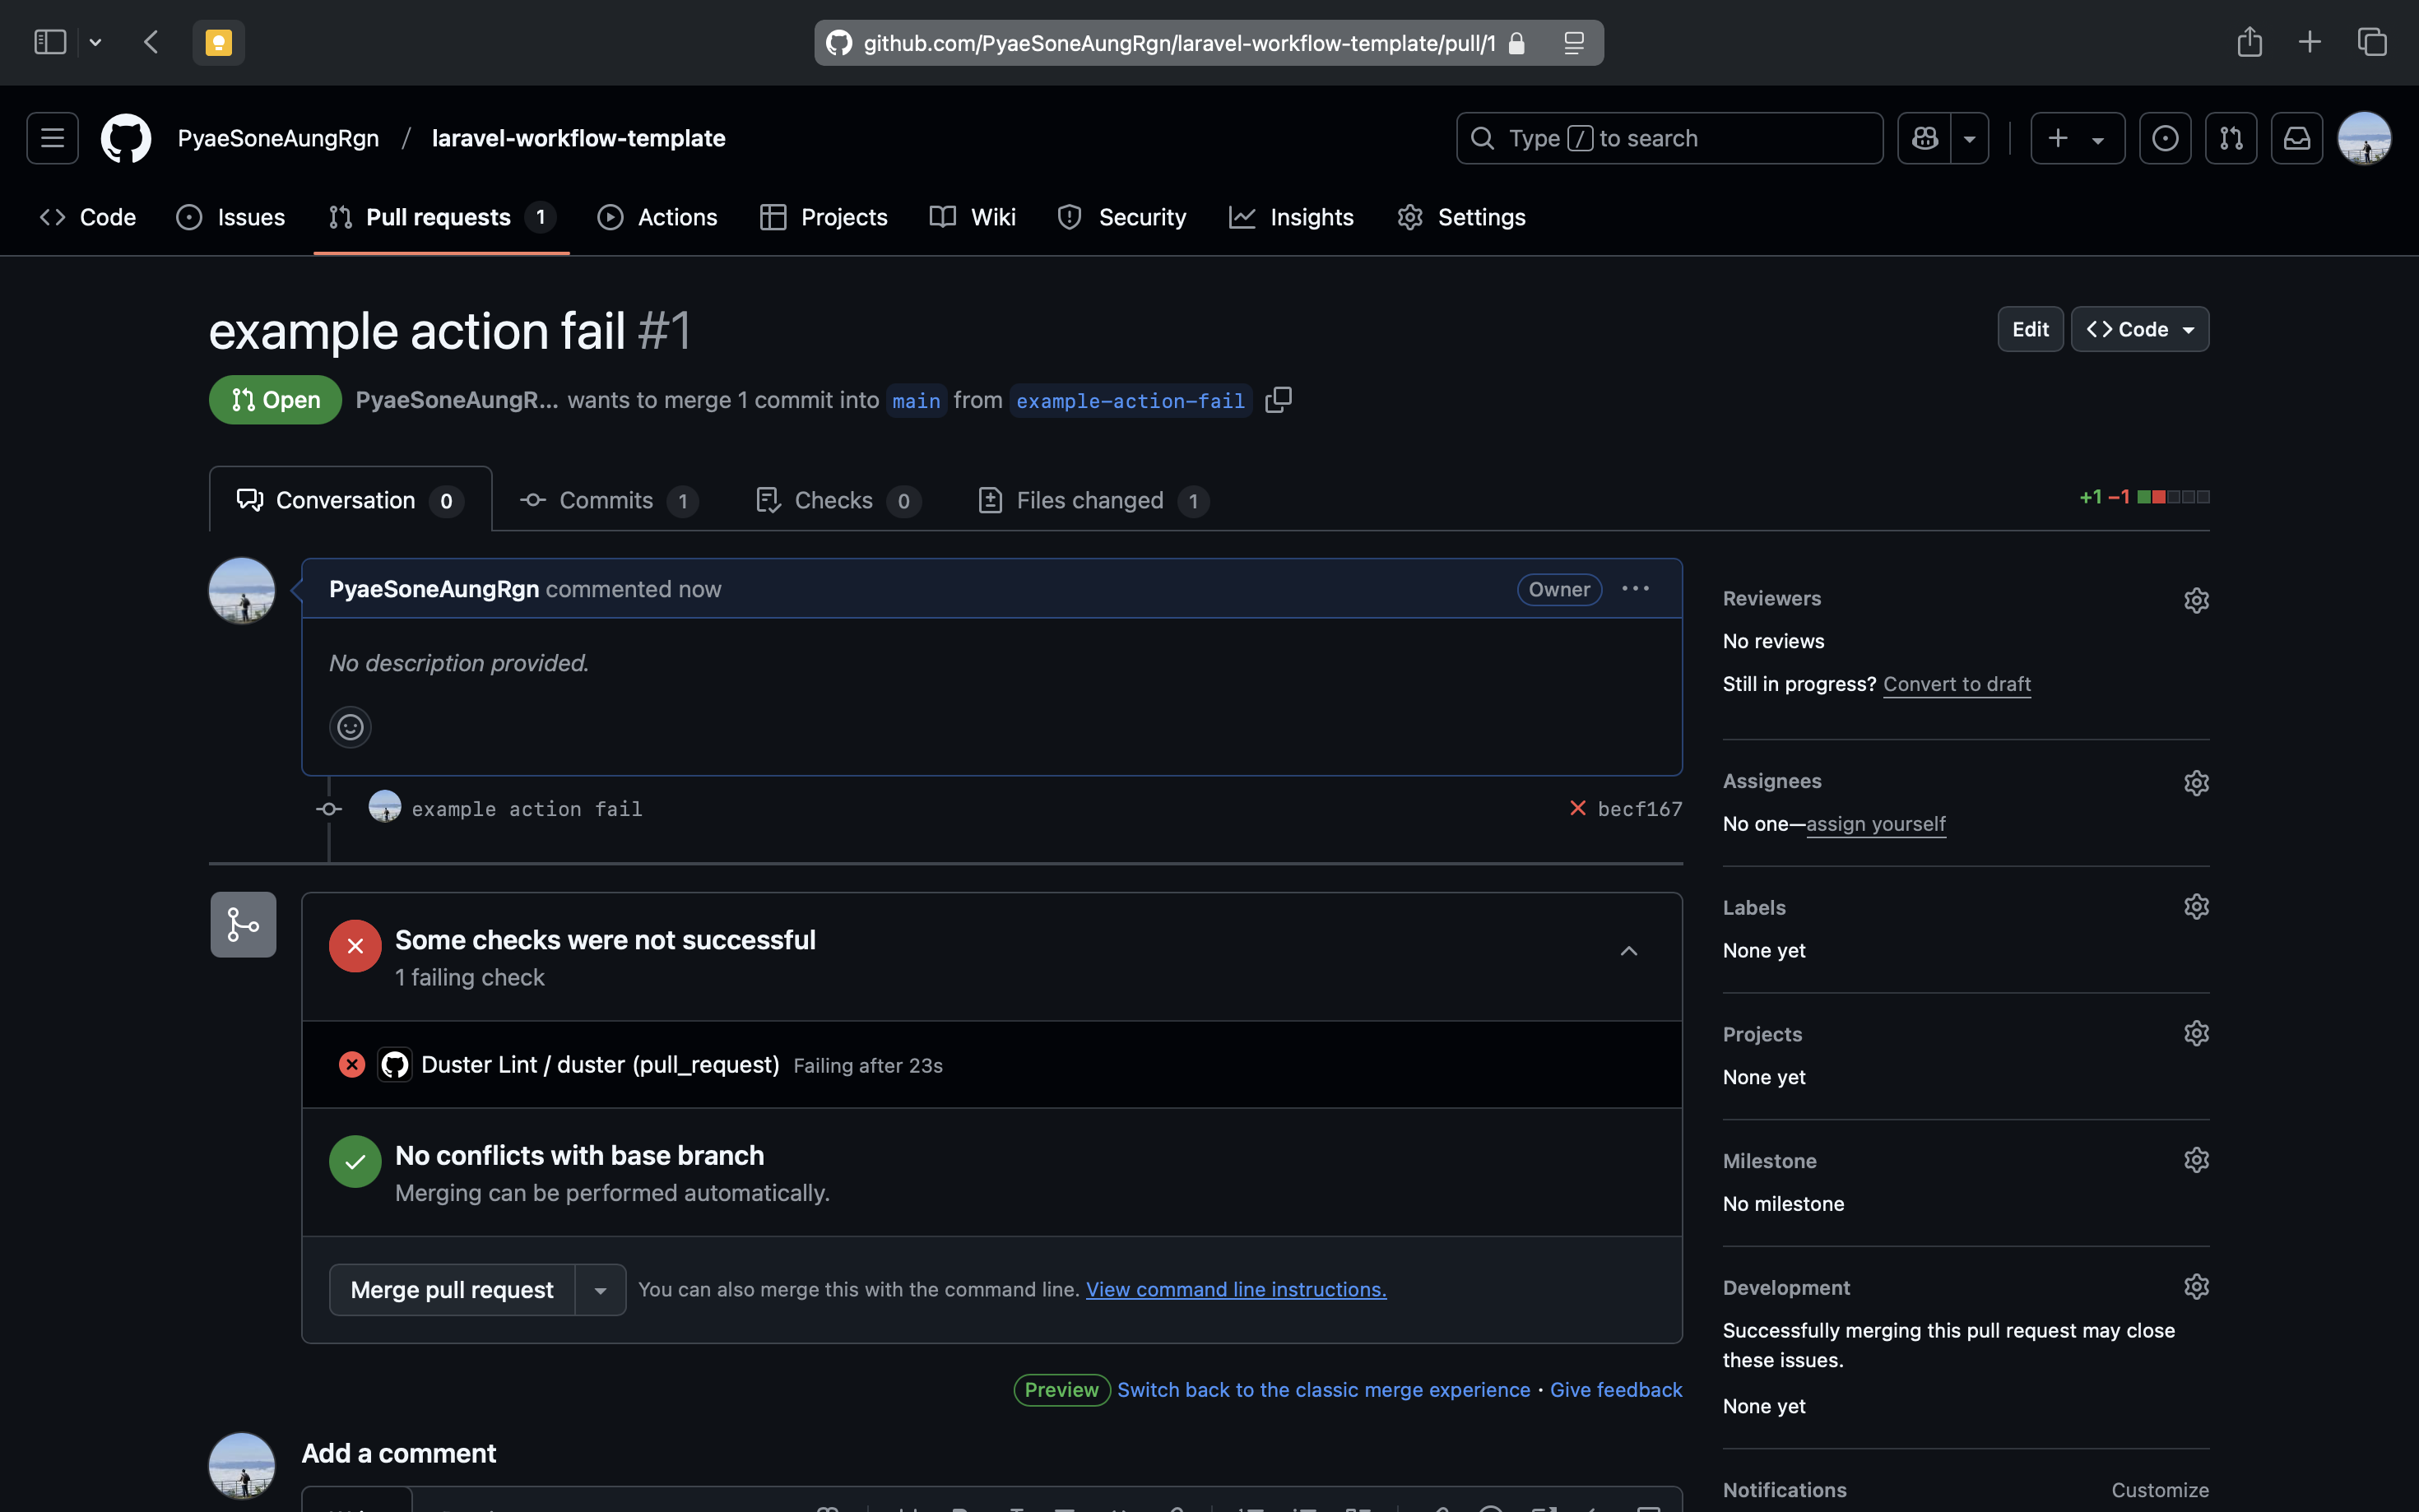
git push လိုက်လို့ error တက်ရင်တော့ အခုလို ပြမှာပါ။

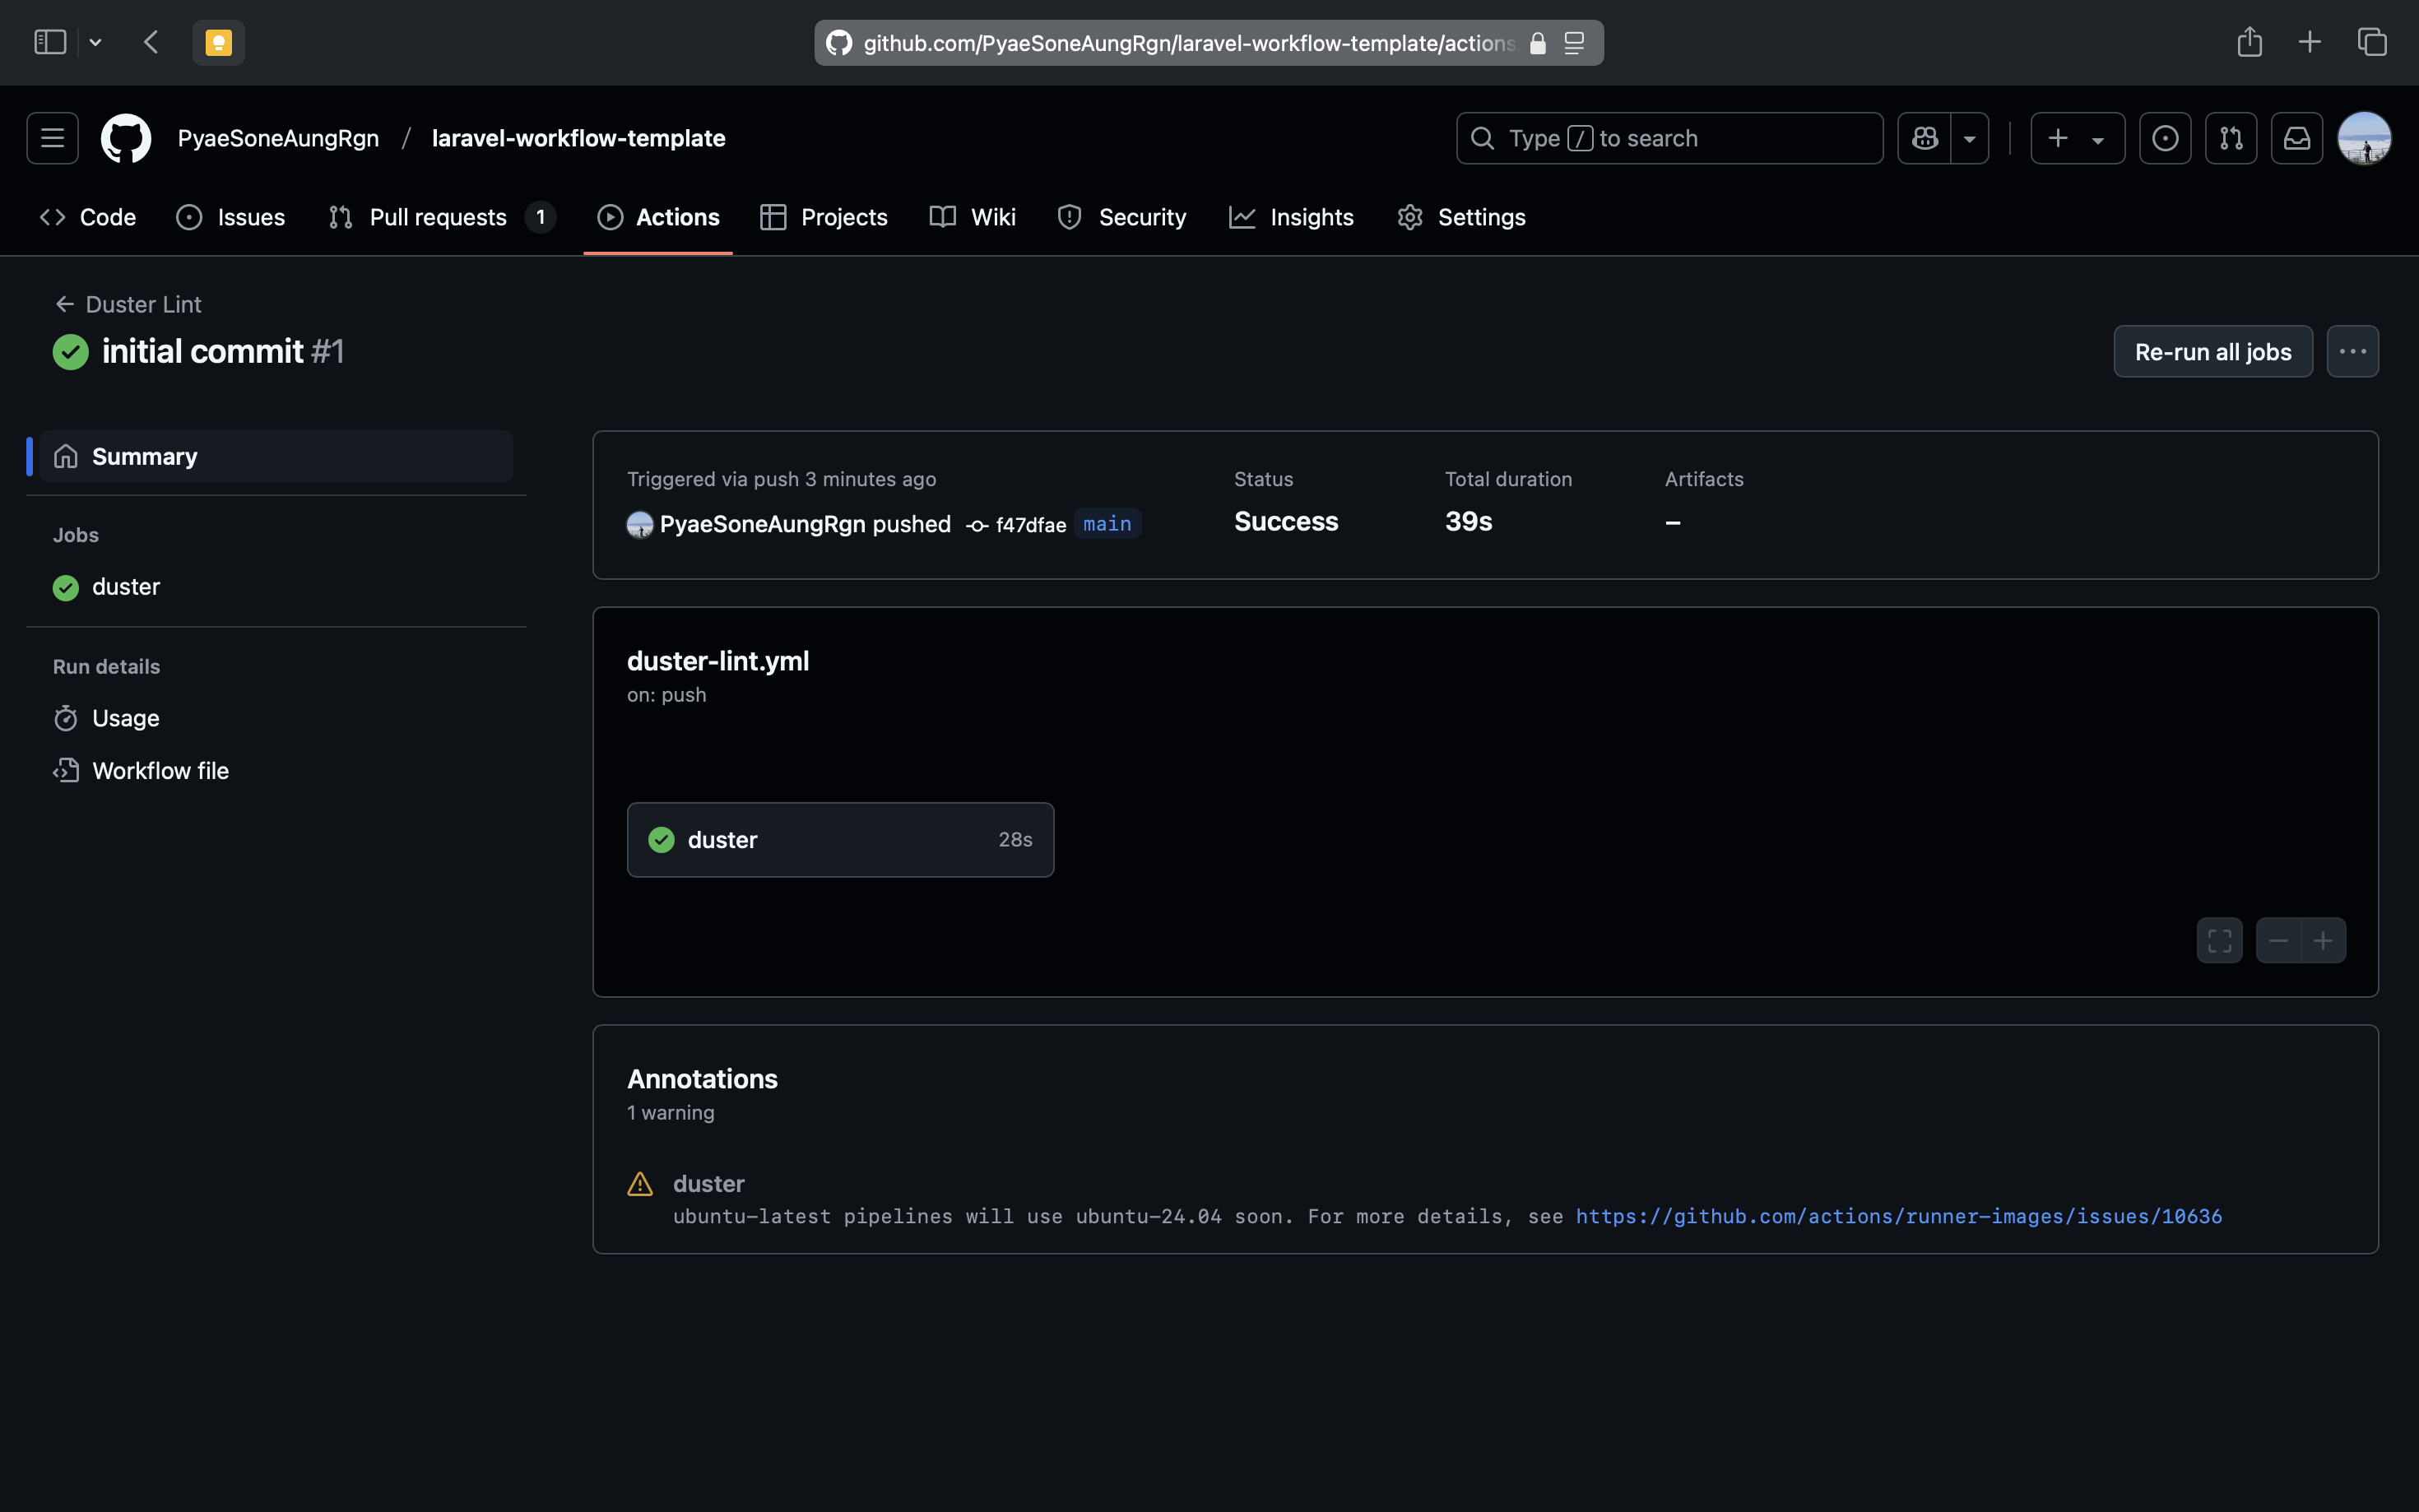
အဆင်ပြေရင်တော့ အခုလို ပြမှာပါ။

Project Template
ဒါတွေကို ကိုယ်တိုင်မလုပ်ချင်ဘူး ဆိုရင်လည်းရပါတယ်။ ကျတော် setup လုပ်ထားတဲ့ repo ကို clone ပြီးတော့ သုံးလို့ရတယ်။ သိချင်တာရှိရင်လည်း မေးလို့ရပါတယ်ခဗျာ။
git clone --depth 1 https://github.com/PyaeSoneAungRgn/laravel-workflow-template.git
cd laravel-workflow-template
composer install
cp .env.example .env
php artisan key:generate
npm install # Setup Husky
npm run build
composer run dev